The HoMedics BPA-260-CBL Blood Pressure Monitor with Voice Assist offers accurate and convenient blood pressure tracking. Designed for home use, it features Smart Measure Technology and a limited five-year warranty, ensuring reliability and ease of use for users seeking to monitor their health effectively.
1.1 Overview of the HoMedics BPA-260-CBL Model
The HoMedics BPA-260-CBL is an advanced blood pressure monitor designed for accurate home use. It features voice assist technology, Smart Measure for reliable readings, and a user-friendly interface. The device includes a high-quality cuff, large LCD display, and memory storage for tracking progress. With a limited five-year warranty, it ensures long-term reliability. This model is ideal for individuals seeking precise blood pressure monitoring with modern convenience, making it a trusted choice for maintaining health and wellness.
1.2 Importance of Accurate Blood Pressure Monitoring
Accurate blood pressure monitoring is crucial for maintaining health and preventing complications. Incorrect measurements can lead to misdiagnosis or inappropriate treatment, posing serious health risks. Regular and precise tracking helps detect hypertension early, enabling timely interventions. It also allows individuals to monitor the effectiveness of lifestyle changes or medications. The HoMedics BPA-260-CBL ensures reliable results, making it an essential tool for proactive health management and reducing the risk of cardiovascular diseases through consistent and accurate readings.
1.3 Key Features of the HoMedics Blood Pressure Monitor
The HoMedics BPA-260-CBL Blood Pressure Monitor features advanced Smart Measure Technology for precise readings. It includes a voice assist function for clear, audible instructions and results. The monitor is designed with an easy-to-read display and intuitive control buttons; Additionally, it offers a limited five-year warranty, ensuring long-term reliability. These features make it a user-friendly and dependable choice for accurate blood pressure tracking, suitable for both home and clinical settings, while providing consistent and reliable health monitoring solutions.
Understanding the Components of the Monitor
The HoMedics Blood Pressure Monitor includes a cuff, display screen, control buttons, and voice assist feature. These components work together to provide accurate and easy-to-understand readings.
2.1 Description of the Cuff and Its Proper Use
The cuff is a key component of the HoMedics Blood Pressure Monitor, designed to wrap around the upper arm. Made of durable fabric, it inflates to measure blood pressure. Proper use requires selecting the correct size to fit your arm circumference, as incorrect sizing can lead to inaccurate readings. Place the cuff 1-2 inches above the elbow crease, ensuring it’s not too tight or loose. Follow the manual’s guidelines for placement and tightening to ensure reliable measurements. Regular inspection for wear and tear is recommended.
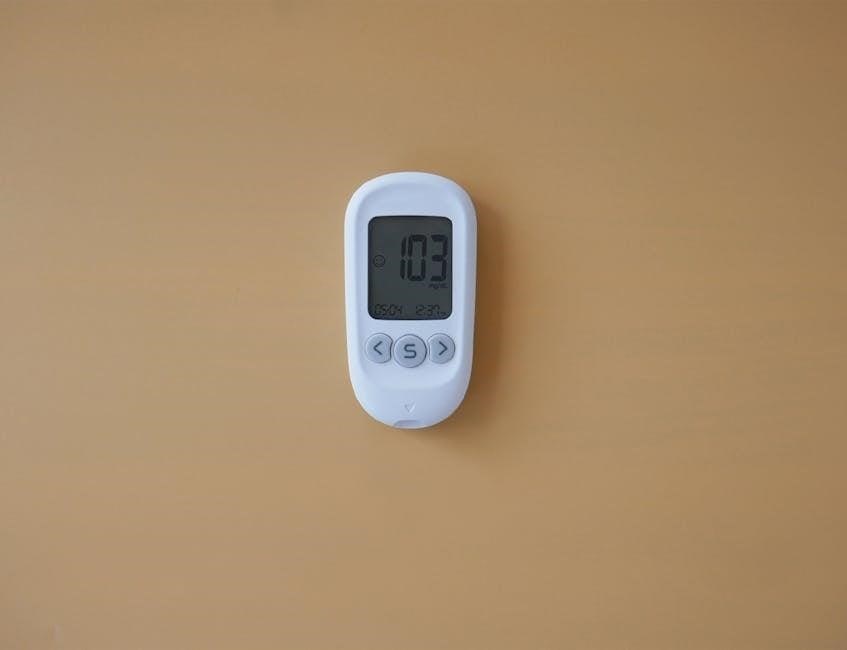
2.2 Display and Control Buttons Explanation
The HoMedics Blood Pressure Monitor features a clear LCD display showing systolic, diastolic, and pulse readings. The control panel includes intuitive buttons for powering on/off, starting measurements, and adjusting settings. The Start/Stop button initiates readings, while Memory buttons store and recall data. A Volume button adjusts the voice assist feature. The display also indicates battery status and error codes. These buttons are designed for easy navigation, ensuring users can operate the device smoothly and access essential functions without confusion.
2.3 Voice Assist Feature Overview
The HoMedics Blood Pressure Monitor includes a Voice Assist feature, providing clear spoken instructions and readings. This feature guides users through the measurement process, ensuring accuracy and ease of use. Voice Assist is particularly helpful for individuals with visual impairments or those who prefer audible feedback. The monitor announces when the cuff is correctly applied and speaks the results, including systolic, diastolic, and pulse readings. The volume can be adjusted for comfort, making the device accessible and user-friendly for everyone.

Preparing for Measurement
Ensure accurate readings by choosing the correct cuff size, preparing your arm, and creating a quiet, comfortable environment. Follow manual guidelines for proper preparation.
3.1 Choosing the Correct Cuff Size
Accurate blood pressure readings depend on using the correct cuff size. Measure your upper arm circumference to select the appropriate cuff, ensuring it fits comfortably. A cuff that is too small or too large can lead to inaccurate readings. The manual provides a size guide to help you choose the right cuff. Proper fit ensures reliable results and comfortable measurements. Always follow the instructions in the manual for optimal accuracy and performance of the HoMedics Blood Pressure Monitor.
3.2 Preparing the Arm for Measurement
Before taking a measurement, ensure your arm is properly prepared. Remove any tight clothing that may restrict blood flow. Sit comfortably with your back straight and feet flat on the floor. Avoid bending your arm or moving during measurement, as this can affect accuracy. Place your arm on a flat surface at heart level. Keep your arm still and relaxed to ensure precise readings. Proper preparation helps achieve consistent and reliable blood pressure results with the HoMedics monitor.
3.4 Ensuring Proper Environment for Accurate Readings
To ensure accurate blood pressure readings, create a calm and stable environment. Find a quiet room away from noise and distractions. Avoid drafts and maintain a comfortable room temperature. Sit in a chair with back support and keep your arm resting at heart level. Ensure good lighting to clearly see the monitor’s display. Avoid eating, smoking, or exercising at least 30 minutes before measurement, as these can temporarily elevate blood pressure. A stable environment helps achieve precise and reliable results with the HoMedics monitor.
Using the HoMedics Blood Pressure Monitor
The HoMedics monitor is designed for easy use, featuring voice assist and Smart Measure Technology for accurate readings. Simply wrap the cuff, press start, and relax.
4.1 Step-by-Step Guide to Taking a Measurement
Sit comfortably with your back straight and feet flat on the floor.
Place the cuff on your bare arm, one inch above the elbow bend.
Press the power button to turn on the monitor.
The cuff will inflate automatically; remain still and silent.
Once measurement is complete, the monitor will display your readings.
Record your results for tracking progress over time.
4.2 Understanding the Smart Measure Technology
The Smart Measure Technology in the HoMedics Blood Pressure Monitor ensures precise and reliable readings. It automatically detects and adjusts to the optimal inflation level for your arm size, eliminating the need for manual adjustments. This advanced feature takes multiple measurements in quick succession and averages them to provide accurate results. By minimizing user error and ensuring consistency, Smart Measure Technology helps you obtain trustworthy blood pressure readings every time, making it easier to track your health effectively.
4.3 Tips for Consistent and Reliable Results
For consistent and reliable results, ensure proper cuff size and placement. Avoid moving or talking during measurement. Sit comfortably with your back supported and arm at heart level. Take measurements at the same time daily for tracking consistency. Ensure the environment is quiet and free from distractions. Regularly check the cuff for wear and tear. By following these guidelines, you can obtain accurate and dependable blood pressure readings, helping you monitor your health effectively over time.
Reading and Interpreting the Results
Understand your blood pressure readings by identifying systolic and diastolic values. Recognize normal, elevated, or high levels to monitor your health effectively and track progress over time.
5.1 Understanding Systolic and Diastolic Readings
The HoMedics monitor displays two key values: systolic (top number) and diastolic (bottom number) readings. Systolic measures pressure during heartbeats, while diastolic measures pressure between beats. Normal blood pressure is typically below 120/80 mmHg, with elevated levels ranging from 120/80 to 129/80 mmHg, and high blood pressure starting at 130/80 mmHg or higher. These readings help users assess their cardiovascular health and track changes over time for better management.
5.2 Identifying Normal, Elevated, and High Blood Pressure Levels
Normal blood pressure is typically below 120/80 mmHg. Elevated levels fall between 120-129 mmHg systolic and less than 80 mmHg diastolic. High blood pressure is diagnosed at 130/80 mmHg or higher. The HoMedics monitor categorizes readings to help users understand their blood pressure status. Monitoring these levels regularly aids in early detection of potential issues and guides lifestyle adjustments or medical interventions to maintain cardiovascular health.
5.3 How to Track Progress Over Time
Regularly monitoring blood pressure with the HoMedics monitor allows users to track changes over time. By taking measurements at consistent intervals and recording the data, individuals can identify trends and patterns. The monitor’s memory feature stores previous readings, making it easy to compare results. Over time, this data helps assess the effectiveness of lifestyle changes or treatments. Users can also share this information with healthcare providers to refine their care plans and ensure better health outcomes. Consistent tracking supports informed decision-making and long-term health management.
Maintenance and Care of the Monitor
Regular cleaning with a soft cloth and mild soap ensures optimal performance. Store the monitor in a cool, dry place, away from direct sunlight. Proper battery care and replacement are essential for longevity and accurate readings.
6.1 Cleaning the Device and Cuff
Regular cleaning ensures optimal performance. Use a soft, dry cloth to wipe the device and cuff. For tougher stains, dampen the cloth with mild soap, avoiding harsh chemicals. Never submerge the monitor or cuff in water. Allow the cuff to air dry completely before use. Avoid using abrasive materials that could damage the surfaces. Proper cleaning and drying prevent bacterial growth and maintain accuracy. If the cuff becomes worn or damaged, replace it immediately to ensure reliable readings.
6.2 Storing the Monitor Properly
Store the HoMedics Blood Pressure Monitor in a cool, dry place, away from direct sunlight and humidity. Avoid extreme temperatures, as they may damage the device. Keep the monitor in its protective case when not in use to prevent scratches or dust accumulation. Ensure the cuff is stored flat or rolled neatly to maintain its shape. Do not store the monitor with the cuff inflated. Keep it out of reach of children and pets to avoid accidental damage. Proper storage ensures longevity and optimal performance.
6.3 Battery Maintenance and Replacement
Use high-quality alkaline batteries for optimal performance. Avoid exposing batteries to extreme temperatures or moisture. Check battery expiration dates before installation. Insert batteries correctly, following the polarity markings. Turn off the monitor when not in use to conserve power. Replace batteries when low-battery indicators appear. For rechargeable batteries, ensure they are fully charged. Avoid mixing old and new batteries. If replacing, use the same type and brand. Proper battery care extends the monitor’s lifespan and ensures accurate readings. Always follow the manual’s guidelines for disposal.
Troubleshooting Common Issues
Address inaccurate readings by ensuring proper cuff fit and positioning. Check for loose connections or low battery. Refer to error codes in the manual for guidance. Restart the device if it malfunctions. Contact customer support for unresolved issues. Regular maintenance and correct usage prevent most common problems, ensuring accurate and reliable performance over time.
7.1 Resolving Inaccurate Readings
To resolve inaccurate readings, ensure the cuff is properly sized and fitted. Sit quietly with your arm at heart level, avoiding movement. Check for correct cuff placement and tightness. Verify the cuff is centered on your bare arm, not over clothing. If issues persist, restart the monitor or replace the batteries. Consult the manual for error codes and their solutions. Ensure the environment is calm and free from distractions. If problems continue, contact HoMedics support for assistance or repair options.
7.2 Fixing Common Error Codes
Common error codes on the HoMedics Blood Pressure Monitor often indicate issues like incorrect cuff size or poor placement. Check the cuff fit and ensure it’s centered on your bare arm. Restart the device and verify proper battery installation. If errors persist, refer to the manual for specific code meanings. For unresolved issues, contact HoMedics customer support for troubleshooting or repair options. Regularly updating to the latest firmware may also resolve recurring errors.
7.3 What to Do If the Monitor Malfunctions
If the HoMedics Blood Pressure Monitor malfunctions, first turn it off and on to reset. Check the batteries and ensure proper installation. Verify the cuff is correctly sized and positioned. If issues persist, consult the manual for troubleshooting steps. Contact HoMedics customer support for assistance or repair options. The monitor is covered by a limited five-year warranty, ensuring defective products are addressed promptly. Regular maintenance and proper usage can help prevent malfunctions and ensure accurate readings.
Warranty and Support Information
The HoMedics Blood Pressure Monitor is backed by a limited five-year warranty, ensuring coverage for defects in materials and workmanship. For support, contact HoMedics customer service or visit authorized service centers for assistance with repairs or replacements under warranty.
8.1 Understanding the Limited Five-Year Warranty
The HoMedics Blood Pressure Monitor comes with a limited five-year warranty, covering defects in materials and workmanship. This warranty ensures that any manufacturing issues are addressed, providing users with peace of mind. It does not cover damage caused by misuse or normal wear and tear. For details, refer to the manual or contact HoMedics customer support. This warranty underscores HoMedics’ commitment to quality and customer satisfaction, making it a reliable choice for home health monitoring.
8.2 Contacting HoMedics Customer Support
For assistance with your HoMedics Blood Pressure Monitor, contact customer support via phone, email, or through the official website. The support team is available to address questions, troubleshooting, or warranty-related inquiries. Visit the HoMedics website for contact details and support resources. Their dedicated team ensures prompt resolution of issues, helping you maintain accurate blood pressure monitoring and optimal device performance.
8.3 Finding Authorized Service Centers
To locate an authorized HoMedics service center, visit the official HoMedics website and use the service center locator tool. Enter your location to find nearby centers. These centers provide genuine parts, repairs, and maintenance, ensuring your blood pressure monitor remains in optimal condition. Contact customer support for assistance in finding the nearest center. Using authorized centers guarantees compliance with warranty terms and ensures reliable service for your device.
Frequently Asked Questions (FAQs)
This section addresses common inquiries about the HoMedics Blood Pressure Monitor, covering topics like usage, maintenance, and troubleshooting to ensure optimal performance and user satisfaction.
9.1 Can the Monitor Be Used for Multiple Users?
The HoMedics Blood Pressure Monitor is designed for individual use, but it can be shared among multiple users if properly recalibrated and cleaned between uses. Ensure each user follows the manual’s guidelines for accurate readings and maintain hygiene standards to prevent cross-contamination. Regular cleaning and proper cuff sizing for each user are essential for consistent and reliable results. Refer to the manual for detailed instructions on preparing the device for multiple users.
9.2 How Often Should I Replace the Cuff?
The cuff on your HoMedics Blood Pressure Monitor should be replaced every 2-3 years or sooner if signs of wear, such as cracks or fraying, appear. Proper cuff maintenance ensures accurate readings. If the cuff becomes damaged or stretched, it may lead to inaccurate measurements. Refer to the manual for guidance on inspecting and replacing the cuff. Note that the cuff is not covered under the warranty and must be purchased separately from authorized retailers or the HoMedics website.
9.3 Is the Monitor Clinically Accurate?
The HoMedics Blood Pressure Monitor is designed to provide clinically accurate readings, ensuring reliable blood pressure measurements. It incorporates Smart Measure Technology, which enhances precision by automatically detecting and adjusting for factors that may affect accuracy. Regular calibration and proper use, as outlined in the manual, are essential to maintain its clinical accuracy. The monitor is intended for personal use and meets standard clinical guidelines for blood pressure monitoring, making it a trusted tool for home health management.
The HoMedics Blood Pressure Monitor is a reliable tool for home use, offering accurate readings and a five-year warranty for user confidence. Follow the manual’s guidelines for optimal performance and health monitoring.
10.1 Summary of Key Points
The HoMedics Blood Pressure Monitor, specifically the BPA-260-CBL model, is designed for accurate home use with features like voice assist and Smart Measure Technology. Proper cuff sizing and usage are emphasized for reliable readings. The device is backed by a limited five-year warranty, ensuring user confidence. Regular maintenance, such as cleaning and proper storage, is essential for longevity. By following the manual’s guidelines, users can effectively monitor their blood pressure and maintain good health. This monitor is a practical solution for consistent and accurate health tracking.
10.2 Final Tips for Effective Use
For optimal results, measure blood pressure at consistent times, ideally in the morning and evening. Ensure the cuff is properly positioned and avoid movement during measurement. Regularly check the cuff for wear and tear, and replace it as needed. Store the monitor in a dry, cool place to maintain accuracy. Take advantage of the voice assist feature for ease of use. Refer to the manual for troubleshooting and maintenance tips to extend the device’s lifespan. By following these guidelines, users can ensure accurate and reliable blood pressure monitoring.