
Paris Baguette Nutrition: A Comprehensive Guide
Navigating Paris Baguette’s nutritional landscape requires accessible resources; thankfully, comprehensive nutrition PDFs and online tools are available for informed dietary choices.
Paris Baguette, a globally recognized bakery chain originating in South Korea, has rapidly expanded its presence, captivating palates with its delightful array of pastries, cakes, breads, and beverages. Beyond the tempting treats, understanding the nutritional content of these offerings is increasingly important for health-conscious consumers. While indulging in these delicacies is enjoyable, being aware of ingredients and macronutrient profiles empowers informed decisions.
This guide delves into the nutrition facts associated with Paris Baguette’s extensive menu. We’ll explore the breakdown of key nutrients, focusing on popular items like macarons, cakes, breads, and savory options. Accessing reliable nutrition information, often found in downloadable PDFs or online resources, is crucial. Decoding these labels allows customers to align their choices with personal dietary needs and preferences, whether managing calorie intake, monitoring sugar consumption, or addressing specific allergies.

Ultimately, this comprehensive overview aims to provide a valuable resource for enjoying Paris Baguette responsibly and making mindful choices.
Overview of Paris Baguette’s Menu
Paris Baguette’s menu is remarkably diverse, presenting a tempting selection beyond simple bakery items. It features an extensive range of European-inspired pastries – delicate macarons, rich cakes, and flaky viennoiseries like croissants and pain au chocolat. Savory options include a variety of sandwiches, salads, and light meals, catering to lunchtime cravings.
Beverages complement the food offerings, with coffee, tea, and fruit juices readily available. Signature cakes, such as the Strawberry Fresh Cream Cake and Real Mocha Cake, are particularly popular. Bread selections range from classic baguettes to sweet and savory loaves, including the King Cream Cheese Foam Bread.
Considering the breadth of choices, understanding the nutritional implications of each category is vital. While nutrition PDFs and online resources provide detailed breakdowns, a general awareness of ingredient profiles – sugars, fats, and carbohydrates – aids in making informed selections.
Nutritional Information Breakdown
Detailed analysis of Paris Baguette’s offerings reveals varying macronutrient profiles; accessing nutrition PDFs is crucial for understanding calorie, fat, and sugar content.
Macaron Nutrition Facts
Paris Baguette’s macarons, delightful and colorful treats, present a nuanced nutritional profile; While small in size, they contribute to daily intake, primarily from sugars and carbohydrates. A standard macaron typically contains around 80-100 calories, with approximately 7-10 grams of sugar and 1-2 grams of fat. Protein content is minimal, usually less than 1 gram per macaron.
Detailed nutritional breakdowns, often found within Paris Baguette’s comprehensive nutrition PDFs, reveal the specific composition of each flavor. Variations exist based on filling ingredients – chocolate, cream, or fruit purees – impacting calorie and sugar levels. Consumers mindful of their sugar intake should exercise moderation, considering a macaron as a small indulgence rather than a substantial snack.
Accessing the official Paris Baguette nutrition PDF allows for precise tracking of macronutrients and informed decision-making. It’s important to note that these values are estimates and can vary slightly based on preparation and ingredient sourcing. Understanding these facts empowers customers to enjoy macarons responsibly as part of a balanced diet.
Cake & Pastry Nutritional Values
Paris Baguette’s extensive cake and pastry selection offers a wide range of nutritional profiles, detailed within their accessible nutrition PDFs. Generally, these items are calorie-dense, primarily due to high sugar and fat content. A slice of fresh cream cake, for instance, can easily exceed 400-600 calories, with significant amounts of saturated fat and added sugars.
Pastries like croissants and danishes, while delicious, contribute substantial calories and fats, often ranging from 250-400 calories per serving. The nutrition PDF clarifies the specific values for each variety, accounting for fillings and glazes. Protein content remains relatively low across most cake and pastry options.
For those monitoring their intake, the PDF provides crucial information for portion control and informed choices. Understanding the nutritional breakdown allows customers to balance indulgence with overall dietary goals. It’s essential to view these treats as occasional pleasures rather than everyday staples.
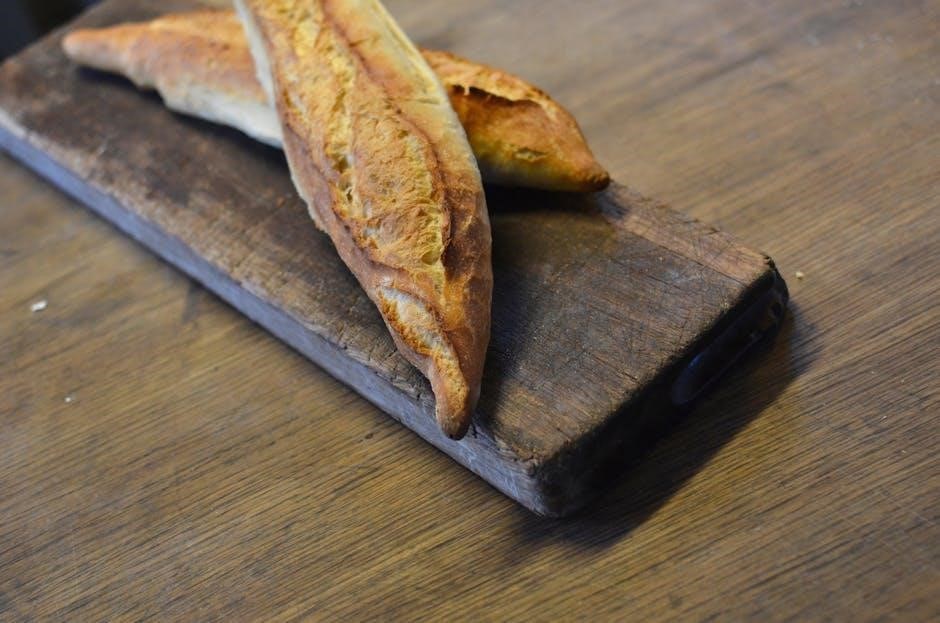
Bread & Viennoiserie Nutrition
Paris Baguette’s bread and viennoiserie offerings, detailed in their nutrition PDFs, present a varied nutritional landscape. While bread can be a source of carbohydrates and some fiber, viennoiserie – like croissants and pain au chocolat – typically contains higher levels of fat and sugar. A standard slice of white bread generally provides around 70-100 calories, with minimal fat.
However, enriched breads and those with added ingredients (like cheese or sweet fillings) will have significantly higher caloric and fat content. The PDFs clearly outline these differences. Viennoiserie items, due to their laminated dough and buttery composition, often range from 200-400 calories per serving.
Protein content in both bread and viennoiserie is moderate. The nutrition PDF assists in making informed choices, allowing customers to select options aligning with their dietary needs and preferences. Whole wheat options offer a fiber boost compared to white bread varieties.
Sandwich & Savory Item Analysis
Paris Baguette’s sandwich and savory item nutrition, as detailed in their accessible PDFs, reveals a spectrum of caloric and macronutrient profiles. These items often combine bread, protein sources (like meats and eggs), vegetables, and sauces, resulting in varied nutritional values. A typical sandwich can range from 400 to 800 calories, depending on the ingredients and portion size.


The PDFs break down the fat, carbohydrate, and protein content for each sandwich, allowing for informed choices. Savory items like quiches and pastries generally contain higher fat content due to their creamy fillings and pastry crusts. Protein levels vary significantly based on the filling – chicken or beef sandwiches offer higher protein than vegetarian options.
Careful review of the nutrition PDF is crucial for those monitoring sodium intake, as processed meats and sauces can contribute significantly. Choosing sandwiches with whole-wheat bread and plenty of vegetables can enhance the nutritional value.

Specific Product Nutrition Details
Detailed nutrition facts for signature items, readily available in Paris Baguette’s PDF guides, empower customers to make choices aligned with their dietary needs.
Strawberry Fresh Cream Cake Nutrition
Delving into the nutritional profile of Paris Baguette’s Strawberry Fresh Cream Cake reveals a delightful, yet calorie-dense, treat. A standard slice, as detailed in their comprehensive nutrition PDF, typically contains approximately 550-650 calories. This stems from a significant carbohydrate content, often exceeding 70 grams, primarily from sugar and flour. Fat content usually ranges between 25-35 grams, largely from the cream and cake base.
Protein contributes a modest 5-10 grams per serving. While the cake offers some calcium from the dairy components, it’s relatively low in fiber and essential vitamins. The PDF also highlights potential allergens, including wheat, eggs, and dairy. For those mindful of sugar intake, the Strawberry Fresh Cream Cake represents a considerable indulgence. Understanding these details, readily accessible through the provided PDF, allows for informed portion control and balanced dietary planning when enjoying this popular dessert.
Real Mocha Cake Nutrition

Examining the nutritional details of Paris Baguette’s Real Mocha Cake, as outlined in their accessible nutrition PDF, reveals a rich and satisfying, yet calorie-substantial, dessert option. A typical slice generally provides around 500-600 calories, largely derived from carbohydrates – often surpassing 65 grams – originating from sugar, flour, and chocolate components. Fat content typically falls between 20-30 grams, stemming from the cake’s creamy layers and chocolate ganache.
Protein contributes approximately 4-8 grams per serving. The mocha flavor introduces a moderate caffeine content. The nutrition PDF clearly indicates potential allergens, including wheat, eggs, dairy, and soy. For individuals monitoring their sugar or caffeine consumption, the Real Mocha Cake should be enjoyed in moderation. Utilizing the detailed information within the PDF empowers consumers to make informed choices and integrate this treat responsibly into their dietary habits.
King Cream Cheese Foam Bread Nutrition
Analyzing the King Cream Cheese Foam Bread’s nutritional profile, as detailed in Paris Baguette’s readily available nutrition PDF, reveals a surprisingly substantial caloric load for a seemingly light pastry. A single serving typically contains approximately 350-450 calories, primarily from carbohydrates – often exceeding 40 grams – sourced from the enriched flour and sweet cream cheese filling. Fat content ranges from 15-25 grams, largely attributed to the cream cheese and buttery dough.
Protein contributes around 6-10 grams per serving. The PDF highlights common allergens, including wheat, eggs, dairy, and soy. While undeniably delicious, mindful consumption is advised, particularly for those monitoring carbohydrate or fat intake. The detailed PDF allows customers to understand the bread’s composition and make informed dietary decisions, balancing indulgence with nutritional awareness. It’s a treat best enjoyed as part of a balanced diet.
Paris Baguette’s Signature Sandwiches: Nutritional Content
Examining Paris Baguette’s signature sandwiches through their comprehensive nutrition PDF reveals a varied nutritional landscape. Calorie counts fluctuate significantly based on filling and bread choice, ranging from approximately 500 to 800+ calories per sandwich. Protein content is generally moderate, around 20-30 grams, derived from meats, eggs, or cheese. Carbohydrate levels are substantial, often exceeding 50 grams, stemming from the bread and accompanying sauces.
Fat content varies widely; options with mayonnaise or richer proteins will naturally be higher. The PDF meticulously lists ingredients, highlighting potential allergens like gluten, soy, and dairy. For health-conscious consumers, opting for sandwiches with lean proteins and whole-wheat bread (when available) is advisable. The detailed PDF empowers informed choices, allowing customers to balance convenience with dietary needs and preferences.
Understanding Paris Baguette’s Ingredients
Detailed ingredient lists, accessible via the Paris Baguette nutrition PDF, illuminate the composition of their offerings, aiding informed dietary decisions.
Common Ingredients and Their Nutritional Impact
Paris Baguette’s delectable creations rely on a foundation of common ingredients, each carrying a unique nutritional profile. Flour, a staple, provides carbohydrates for energy, but its type – enriched or whole wheat – significantly impacts fiber content and glycemic index. Sugar, prevalent in pastries and cakes, contributes sweetness but offers minimal nutritional value and can lead to rapid blood sugar spikes.
Fats, sourced from butter, oils, and cream, add richness and flavor, yet are calorie-dense and should be consumed in moderation. Eggs contribute protein and essential nutrients, while dairy products provide calcium and vitamin D. The Paris Baguette nutrition PDF details these components.
Understanding how these ingredients interact is crucial. For instance, combining refined carbohydrates with fats can hinder nutrient absorption. Examining the PDF allows consumers to assess the balance of macronutrients – carbohydrates, proteins, and fats – in each item, facilitating healthier choices aligned with individual dietary needs and preferences. Careful consideration of ingredient lists empowers informed decisions.

Allergen Information & Dietary Considerations
Paris Baguette, like many bakeries, utilizes common allergens in its products. Wheat, dairy, eggs, and nuts are frequently present, posing risks for individuals with sensitivities or allergies. The Paris Baguette nutrition PDF typically includes a detailed allergen chart, specifying which items contain these ingredients. Careful review is essential for those managing dietary restrictions.
For customers following specific diets, such as gluten-free or vegan lifestyles, options are limited but evolving. While dedicated gluten-free items are scarce, some breads and pastries may be naturally lower in gluten. Vegan alternatives are even rarer, often requiring careful ingredient scrutiny.
The nutrition PDF serves as a vital resource for identifying potential allergens and making informed choices. It’s crucial to note potential cross-contamination during preparation. Individuals with severe allergies should exercise extreme caution and directly inquire with bakery staff regarding ingredient sourcing and handling procedures.

Finding Paris Baguette Nutrition Information
Locating detailed nutritional data is streamlined through Paris Baguette’s readily available nutrition PDFs and comprehensive online resources for customers.
Accessing Nutrition PDFs and Online Resources
Paris Baguette understands the growing need for transparency regarding food nutrition, and they’ve proactively addressed this by making detailed information easily accessible to their customers. The primary method for obtaining comprehensive nutritional breakdowns is through downloadable PDFs available on their official website. These PDFs typically categorize items by product type – cakes, pastries, breads, sandwiches, and beverages – allowing for quick and targeted searches.
Furthermore, Paris Baguette often provides links to these PDFs directly on their online ordering platforms, enabling customers to review nutritional facts before making a purchase. Beyond PDFs, several third-party websites and apps compile nutritional information from various restaurant chains, including Paris Baguette, though verifying the accuracy of these sources is always recommended. Directly consulting the official Paris Baguette resources ensures the most up-to-date and reliable data.
For those preferring a more interactive experience, some locations may display nutritional information on in-store kiosks or through QR codes linked to online resources. This multi-faceted approach demonstrates Paris Baguette’s commitment to empowering customers with the knowledge to make informed dietary choices.
Decoding Nutrition Labels at Paris Baguette
Paris Baguette’s nutrition labels, found within their comprehensive PDFs and occasionally displayed in-store, adhere to standard nutritional labeling guidelines. Key components include serving size, calories, total fat (with saturated and trans fat breakdowns), cholesterol, sodium, total carbohydrates (including dietary fiber and sugars), and protein. Understanding these elements is crucial for making informed choices.
Pay close attention to the serving size, as nutritional information is based on that quantity; a larger portion will naturally contain more calories and nutrients. The % Daily Value (%DV) indicates how much a nutrient in a serving contributes to a 2,000-calorie diet. Focusing on limiting saturated fat, trans fat, sodium, and added sugars is generally advisable.
When reviewing the carbohydrate content, consider the amount of dietary fiber, as it promotes digestive health. The PDF documents often include allergen information alongside the nutritional facts, a vital consideration for individuals with dietary restrictions. Carefully scrutinizing these labels empowers customers to align their food choices with their health goals.

Healthier Choices at Paris Baguette
Utilizing the Paris Baguette nutrition PDF, discover lower-calorie options and protein-rich selections for mindful eating, supporting a balanced and enjoyable experience.
Lower Calorie Options
For health-conscious patrons, Paris Baguette offers several choices that align with lower-calorie dietary needs. Consulting the Paris Baguette nutrition PDF is crucial for making informed decisions. Consider opting for their lighter pastries, such as certain fruit tarts or smaller-sized cakes, instead of heavier cream-filled varieties.
Savory options also present opportunities for calorie reduction. Their salads, when dressed lightly, can be a satisfying and relatively low-calorie meal; Additionally, exploring their sandwich selection and choosing those with leaner proteins and whole-wheat bread – details readily available in the PDF – can contribute to a lighter meal.
Be mindful of portion sizes; even healthier items can contribute to excess calorie intake if consumed in large quantities. Prioritizing items with fresh fruit and avoiding excessive sugary glazes or creams, as detailed within the nutritional information, will further support your goals. Remember to always check the PDF for the most accurate and up-to-date information.
High Protein Selections
Increasing protein intake at Paris Baguette requires careful selection, aided by the detailed Paris Baguette nutrition PDF. While primarily a bakery, several items contribute meaningfully to daily protein goals. Focus on sandwiches featuring chicken or turkey, as these generally offer a higher protein content compared to vegetarian options.
Savory pastries containing egg or meat fillings can also provide a protein boost. However, always verify the specific nutritional information within the PDF, as fillings and portion sizes vary considerably. Consider pairing a smaller pastry with a side of yogurt or a protein-rich drink to supplement your intake.
Unfortunately, traditional bakery items like cakes and sweet breads are typically low in protein. Utilizing the PDF to compare options and prioritizing those with added nuts or seeds – though also higher in fat – can offer a slight protein advantage. Remember, strategic choices and PDF consultation are key.
Tips for Mindful Eating at Paris Baguette
Enjoying Paris Baguette doesn’t necessitate abandoning health goals; mindful eating, guided by the Paris Baguette nutrition PDF, is crucial. Begin by thoroughly reviewing the PDF before ordering, identifying potentially oversized portions or hidden sugars. Consider sharing larger pastries or cakes to reduce individual calorie intake.
Prioritize savoring each bite, paying attention to fullness cues. The bakery’s inviting atmosphere can encourage overconsumption, so practice slowing down and appreciating the flavors. Opt for items with visible ingredients – fruits, nuts – promoting a sense of satisfaction with smaller portions.
Utilize the PDF to make informed swaps; perhaps choosing a smaller bread with a lighter spread instead of a fully loaded pastry. Remember, mindful eating isn’t about restriction, but about conscious enjoyment and portion control, maximizing pleasure while staying aligned with your dietary needs.
Comparing Paris Baguette to Other Bakeries
Analyzing Paris Baguette’s nutrition, via available PDFs, reveals similarities and differences in calorie counts and ingredient profiles compared to competing bakery chains.
Nutritional Comparison with Competitors
Examining Paris Baguette’s nutritional offerings, particularly utilizing available PDFs, alongside those of competitors like Panera Bread and Dunkin’, reveals interesting contrasts. Generally, Paris Baguette’s pastries and cakes tend to be higher in sugar and total fat content compared to Panera’s, though portion sizes can influence this. Dunkin’, conversely, often presents options with fewer calories but also lower overall nutritional value, relying more on artificial flavors and sweeteners.
Specifically, a slice of Paris Baguette’s Strawberry Fresh Cream Cake, as detailed in their nutrition information, boasts a richer, more decadent profile than a similar offering at Panera. However, Panera frequently provides more transparent nutritional breakdowns and emphasizes whole grains in certain bread selections. Dunkin’s muffins, while convenient, often contain significantly more added sugar. Accessing and comparing these PDFs allows consumers to make informed decisions based on their individual dietary needs and preferences, highlighting the importance of detailed nutritional transparency within the bakery industry.
Paris Baguette’s Position in the Bakery Market
Paris Baguette occupies a unique position, blending French-inspired techniques with Korean bakery traditions, resulting in visually appealing and flavorful offerings. However, analyzing their nutritional information – readily available in downloadable PDFs – reveals a focus on indulgence rather than health-consciousness, positioning them slightly differently than competitors emphasizing “better-for-you” options.
Compared to chains like Panera Bread, which actively market healthier choices and detailed nutritional breakdowns, Paris Baguette’s marketing leans towards premium ingredients and aesthetic presentation. While nutritional PDFs are accessible, they aren’t always prominently displayed. This suggests a target audience prioritizing taste and experience over strict dietary restrictions. Their success hinges on this perceived value, despite a generally higher calorie and sugar content across many items. Understanding this positioning, informed by their nutritional data, is crucial for consumers seeking balanced choices;