The Nikon D5200 is a versatile DSLR camera offering exceptional image quality, Full HD video recording, and intuitive controls, ideal for both hobbyists and professionals.
1.1 Overview of the Nikon D5200 Camera
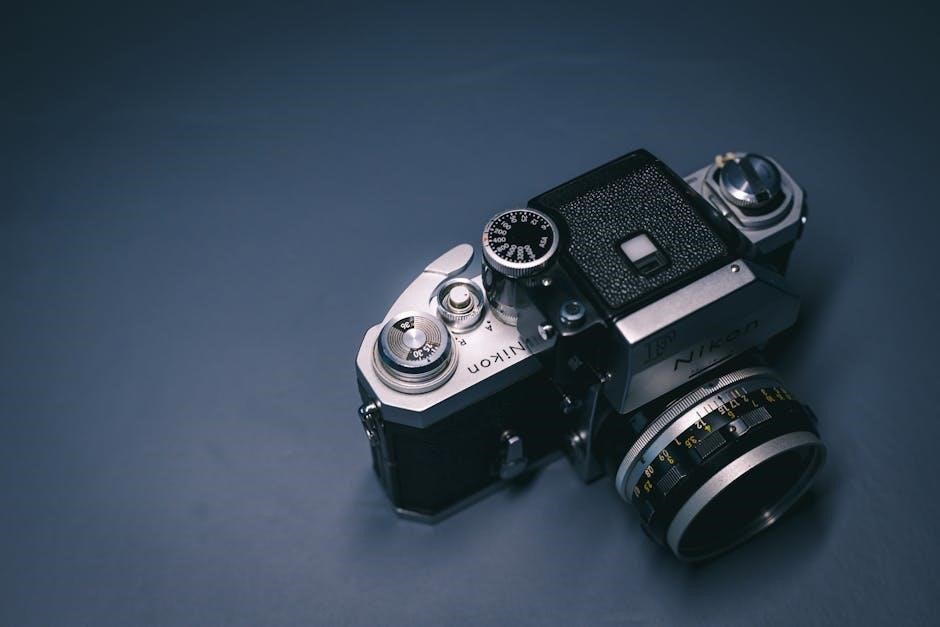
The Nikon D5200 is a mid-range DSLR camera designed for enthusiasts and professionals alike. Released in 2013, it features a 24.1-megapixel APS-C sensor, delivering high-quality images with excellent detail. The camera supports Full HD video recording at 1080p, making it versatile for both stills and motion capture. Its ergonomic design ensures comfortable handling, while the vari-angle LCD screen offers flexibility in framing shots. With built-in HDR and Scene modes, the D5200 caters to a wide range of photography needs, from casual snapshots to creative projects. Its compatibility with Nikon’s extensive lens system further enhances its versatility.
1.2 Key Features of the Nikon D5200
The Nikon D5200 boasts a 24.1-megapixel CMOS sensor, ensuring vivid and detailed images. It features an 11-point autofocus system for precise subject tracking and a 3-inch vari-angle LCD screen for flexible shooting angles. The camera supports ISO sensitivity from 100 to 6400, expandable to 25600, allowing for low-light photography. It also offers Full HD video recording at 60i/50i with manual controls. The D5200 includes built-in HDR, multiple scene modes, and creative filters, enhancing creative possibilities. Compatibility with Nikon’s F-mount lenses and wireless connectivity options further expand its capabilities, making it a robust choice for photographers of various skill levels.
1.3 Target Audience for the Nikon D5200
The Nikon D5200 is designed for a diverse range of photographers, from beginners to advanced enthusiasts. Hobbyists and professionals seeking a balance between performance and portability are its primary users. The camera’s intuitive interface and automatic modes cater to those new to DSLRs, while its manual controls and RAW shooting capabilities appeal to more experienced photographers. Additionally, its affordability and robust feature set make it an excellent choice for photography students and semi-professionals. The D5200 is also suitable for content creators and videographers who value its Full HD video capabilities and vari-angle LCD screen.

Getting Started with the Nikon D5200
Begin by unboxing and setting up your camera, charging the battery, and inserting the memory card. Familiarize yourself with the camera’s layout and essential controls for a smooth start.
2.1 Unboxing and Initial Setup
Upon unboxing the Nikon D5200, you’ll find the camera body, 18-55mm VR lens, battery, charger, and user manual. Begin by inserting the battery and memory card, ensuring they are securely locked in place. Next, charge the battery fully before first use. Power on the camera to initialize the setup process. Navigate through the initial menu to set language, date, and time. Familiarize yourself with the camera’s ergonomics and essential controls. Finally, perform a quick check to ensure all components are functioning properly before capturing your first images.
2.2 Charging the Battery and Inserting the Memory Card
Charge the EN-EL3e battery using the supplied MH-24 charger until the indicator turns green. Insert the battery into the camera’s battery compartment, ensuring it clicks securely into place. For the memory card, open the SD card slot on the right side of the camera. Insert a compatible SD, SDHC, or SDXC card with a capacity of up to 64GB. Ensure the card is formatted in the camera for optimal performance. Avoid using multiple cards simultaneously. Power off the camera before inserting or removing the card to prevent data loss or damage. Always use genuine Nikon accessories to maintain functionality and safety.
2.3 Understanding the Camera Layout and Controls
Familiarize yourself with the Nikon D5200’s exterior controls to enhance shooting efficiency. The mode dial on top allows quick access to shooting modes like Auto, P, S, A, and M. The shutter release button is located on the top right, alongside the power switch. Use the multi-selector on the rear for navigating menus and selecting autofocus points. The zoom control on the lens enables precise framing. The LCD screen on the back displays settings and previews, while the viewfinder provides a clear eye-level preview. The function button (Fn) near the lens offers quick access to ISO, white balance, and image quality settings. The command dial on the rear adjusts aperture, shutter speed, or exposure compensation depending on the mode. Understanding these controls helps streamline your workflow and improves your photography experience.

Shooting Modes on the Nikon D5200
The Nikon D5200 features a variety of shooting modes, including automatic options like Auto, Portrait, and Landscape, as well as manual modes such as Aperture Priority, Shutter Priority, and Manual Mode.
3.1 Automatic Modes: Auto, Portrait, Landscape, etc.
The Nikon D5200 offers several automatic shooting modes designed to simplify photography. Auto mode automatically adjusts settings for optimal results. Portrait mode emphasizes subject sharpness and soft background blur. Landscape mode enhances detail and color in scenic shots. Additional automatic modes include Child, Close-up, Night Portrait, and Sports. These modes allow users to capture stunning images effortlessly, making them ideal for beginners or quick shooting situations. The camera’s Scene Auto Selector can also automatically choose the best mode based on the scene, ensuring versatile and high-quality results in various conditions.
3.2 Manual Modes: Aperture Priority, Shutter Priority, Manual Mode
The Nikon D5200 offers advanced manual shooting modes for precise control. In Aperture Priority (A), users set the aperture, and the camera adjusts shutter speed for depth of field control. Shutter Priority (S) allows setting shutter speed to freeze or blur motion, with the camera adjusting aperture. Manual Mode (M) provides full control over both aperture and shutter speed for creative freedom. These modes cater to experienced photographers seeking to fine-tune their shots, offering flexibility in various lighting conditions and artistic scenarios.

Menu System of the Nikon D5200
The Nikon D5200 features an intuitive menu system with Shooting, Playback, and Setup options, allowing users to customize settings, review images, and adjust camera preferences efficiently.
4.1 Navigating the Shooting Menu
The Shooting Menu on the Nikon D5200 provides access to key camera settings for capturing images. Users can adjust ISO sensitivity, Image Quality, White Balance, and Autofocus modes. The menu is divided into several tabs, making it easy to locate specific options. To navigate, use the multi-selector to scroll through options and press OK to select. Customization options, such as assigning functions to buttons, can also be accessed here. This menu is essential for optimizing camera settings to suit various shooting conditions and personal preferences, ensuring the best results in different lighting and subject scenarios.
4.2 Playback Menu Options
The Playback Menu on the Nikon D5200 allows users to view, manage, and edit images stored on the memory card. Key options include deleting photos, rotating images, and creating slide shows. Users can also apply filters, such as monochrome or sepia tones, to images during playback. Additionally, the menu offers tools for selecting and deselecting images for printing or transferring. These features make it easy to organize and enhance photos directly on the camera, providing a convenient way to manage your collection without needing a computer.
4.3 Setup Menu Customization
The Setup Menu on the Nikon D5200 enables users to customize camera settings for a personalized experience. Options include selecting the camera’s language, adjusting the image review duration, and setting the brightness of the LCD monitor. Users can also format memory cards, reset shooting settings, and update firmware. Additionally, the menu allows for enabling or disabling features like autofocus assist and voice memos. These customization options enhance usability and ensure the camera operates according to individual preferences, making it easier to capture photos and videos effectively. Refer to the user manual for detailed instructions on configuring these settings.

Customizing Camera Settings
Customize your Nikon D5200 to suit your photography style by adjusting ISO sensitivity, white balance, and autofocus settings for optimal results in various lighting conditions and scenarios.
5.1 Adjusting ISO Sensitivity
Adjusting the ISO sensitivity on your Nikon D5200 allows you to control the camera’s responsiveness to light. Lower ISO settings (100-400) are ideal for bright lighting conditions, producing sharp images with minimal noise. Higher ISOs (6400-25600) are better suited for low-light environments, though they may introduce grain. The camera also features an Auto ISO mode, which automatically adjusts sensitivity based on lighting conditions. For precise control, ISO can be set manually via the Shooting Menu or quickly accessed using the INFO screen, ensuring optimal image quality in various shooting scenarios.
5.2 White Balance Settings for Different Lighting Conditions
White balance on the Nikon D5200 ensures accurate color representation by adjusting to various lighting conditions. Preset options include Auto, Daylight, Fluorescent, and more. Use the Shooting Menu to select settings like Incandescent or Cloudy for specific environments. Auto White Balance automatically detects and adjusts colors based on lighting conditions. For precise control, use the Preset Manual option to capture a reference image and customize white balance. This feature enhances image fidelity and reduces post-processing needs, delivering natural colors in diverse lighting scenarios.
5.3 Autofocus Settings and Modes
The Nikon D5200 offers advanced autofocus (AF) settings for precise control. Choose from AF-A (Auto-Servo AF), AF-C (Continuous AF), and AF-S (Single AF) modes. AF-A automatically switches between AF-S and AF-C based on subject movement. Use AF-C for dynamic tracking of moving subjects, while AF-S is ideal for stationary objects. The Multi-CAM 4800DX sensor provides 39 focus points, ensuring accurate and fast subject acquisition. Customize AF settings via the Shooting Menu or INFO screen for optimal performance in various shooting scenarios, enhancing your ability to capture sharp images effortlessly.

Image Management and Transfer
The Nikon D5200 allows seamless image management and transfer. Use a USB cable or wireless adapters for quick transfers to your computer. Organize photos using compatible software for efficient storage and editing, ensuring your memories remain accessible and well-arranged.
6.1 Understanding File Formats (JPEG, RAW, etc.)
The Nikon D5200 supports various file formats, including JPEG and RAW. JPEG is ideal for sharing and printing, offering compressed, high-quality images. RAW files store uncompressed data, providing greater flexibility during post-processing. The camera also allows simultaneous recording of both formats, enabling quick sharing while retaining detailed originals. Understanding these formats helps users optimize storage and workflow, ensuring the best results for their photography needs, whether professional or casual.
6.2 Transferring Images to a Computer
Transferring images from the Nikon D5200 to a computer is straightforward. Use a USB cable to connect the camera directly, or insert the memory card into a card reader. Nikon provides software like ViewNX 2 or Camera Control Pro for seamless transfer and organization. Users can also transfer files using drag-and-drop in file explorer or through wireless adapters. Organize images into folders and rename them for easy access. Ensure the computer recognizes the device or card to begin the transfer process. This method ensures your photos are safely stored and ready for editing or sharing, maintaining quality and convenience throughout the workflow.
6.3 Organizing and Storing Photos
Organizing and storing photos efficiently is crucial for maintaining accessibility and quality. Store images in clearly labeled folders on external drives or cloud storage. Use software like Nikon ViewNX 2 to categorize and tag photos with metadata. Regularly back up files to prevent data loss. Consider archiving RAW files separately from JPEGs for long-term preservation. Utilize cloud platforms for remote access and sharing. Proper organization ensures quick retrieval and enhances workflow efficiency, while secure storage protects your valuable photography collection from damage or loss, ensuring your memories remain intact and easily accessible for years to come.
Maintenance and Care for the Nikon D5200
Regularly clean the sensor and lens to prevent dust buildup. Update firmware for optimal performance. Store the camera in a dry, cool place. Handle with care to avoid damage.
7.1 Cleaning the Sensor and Lens
Cleaning the Nikon D5200’s sensor and lens is essential for maintaining image quality. Use a soft, dry microfiber cloth to wipe the lens, avoiding harsh chemicals. For the sensor, use a blower or soft-bristled brush to remove dust. Avoid touching the sensor surface. If necessary, use a cleaning solution specifically designed for camera sensors. Always turn off the camera before cleaning and follow the manual’s guidelines to prevent damage. Regular cleaning ensures sharp, dust-free images and prolongs the camera’s lifespan. Refer to the user manual for detailed step-by-step instructions.
7.2 Updating Firmware
Updating the Nikon D5200’s firmware ensures optimal performance and resolves any bugs. Use the Nikon Manual Viewer 2 app or the provided reference CD to check for updates. Connect the camera to a computer, download the latest firmware, and follow on-screen instructions. Ensure the battery is fully charged and avoid interruptions during the update. Firmware updates enhance camera functionality, improve compatibility with lenses and accessories, and fix known issues. Regularly checking for updates keeps your camera running smoothly and ensures you have the latest features. Always refer to the user manual for detailed steps to avoid errors during the process.
7.3 Battery Maintenance Tips
Proper care of the Nikon D5200’s battery ensures longevity and reliable performance. Always insert the battery correctly, aligning the terminals as shown in the manual. Avoid extreme temperatures and store the battery in a cool, dry place when not in use. Prevent overcharging by removing the battery from the charger once fully charged. Use only original Nikon chargers to maintain battery health. Clean terminals with a soft cloth to prevent connection issues. Replace the battery if it no longer holds a charge. Following these guidelines optimizes battery life and ensures consistent camera operation, as outlined in the instruction manual.

Troubleshooting Common Issues
Address issues like camera freeze by restarting or updating firmware. Fix blurry images by cleaning the lens and ensuring proper autofocus settings. Resolve connectivity problems by checking cable connections and ensuring proper device pairing, as detailed in the manual.
8;1 Resolving Camera Freeze or Lag
If your Nikon D5200 freezes or lags, restart the camera by turning it off and on. Ensure the firmware is updated to the latest version, as outdated software can cause performance issues. Clean the camera’s sensor and lens to remove dirt or smudges that might interfere with functionality. Check the memory card for corruption by formatting it in the camera or using a card reader. If the issue persists, reset the camera to its default settings or contact Nikon support for further assistance.
8.2 Fixing Blurry or Unsharp Images
Blurry or unsharp images with the Nikon D5200 can often be resolved by ensuring proper focus. Use the AF-M mode to manually adjust focus for precise control. Clean the lens and sensor regularly to avoid smudges affecting image clarity. Shoot in well-lit conditions and avoid using low shutter speeds without a tripod. Enable image stabilization if available. Check for firmware updates, as they often improve autofocus performance. If issues persist, reset the camera to default settings or consult the user manual for advanced troubleshooting steps.
8.3 Solving Connectivity Problems
Troubleshoot connectivity issues by restarting the camera and ensuring all cables are securely connected. Use the correct USB mode (e.g., MTP or PTP) for transferring images. Check the camera’s firmware is up to date, as updates often improve compatibility; For wireless transfers, ensure Wi-Fi is enabled and the Nikon Manual Viewer 2 app is installed on your device. Resetting the camera to default settings can also resolve unexpected connectivity problems. Refer to the user manual for detailed instructions or contact Nikon support for further assistance.

Additional Resources and Support
Explore the Nikon Manual Viewer 2 app, online tutorials, and Nikon’s official website for guides. Visit the Nikon download center for firmware updates and software tools.
9.1 Accessing the Nikon D5200 User Manual
The Nikon D5200 user manual is readily available in PDF format on Nikon’s official website. Visit the support section, select your camera model, and download the manual for free. It provides detailed instructions on camera functions, shooting modes, and troubleshooting. Additionally, the Nikon Manual Viewer 2 app offers a digital version for easy access on smartphones and tablets. This comprehensive guide ensures users can fully utilize their camera’s features and resolve any issues efficiently. It’s an essential resource for mastering the Nikon D5200’s capabilities and optimizing your photography experience.
9.2 Online Tutorials and Guides
Online tutorials and guides provide hands-on learning for mastering the Nikon D5200; Nikon’s official website offers detailed video tutorials covering essential features like shooting modes, autofocus settings, and video recording. Additionally, platforms like YouTube host tutorials from experienced photographers, offering tips for improving image quality and exploring creative techniques. These resources are ideal for both beginners and advanced users, helping them unlock the camera’s full potential. They also address common issues and provide step-by-step solutions, ensuring users can troubleshoot and enhance their photography skills efficiently. These guides complement the user manual, offering practical insights for everyday use.

9.3 Nikon Customer Support and Community Forums
Nikon offers comprehensive customer support, including live chat, phone, and email assistance, to address user inquiries and technical issues. Community forums provide a platform for photographers to share experiences, ask questions, and receive advice from experts and fellow users. These forums often feature discussions on troubleshooting, optimal camera settings, and creative techniques. Nikon also provides firmware updates and maintenance tips through their support channels, ensuring users can keep their D5200 up-to-date and functioning at its best. Additionally, the Nikon website hosts downloadable resources, manuals, and guides to further assist users in mastering their camera.