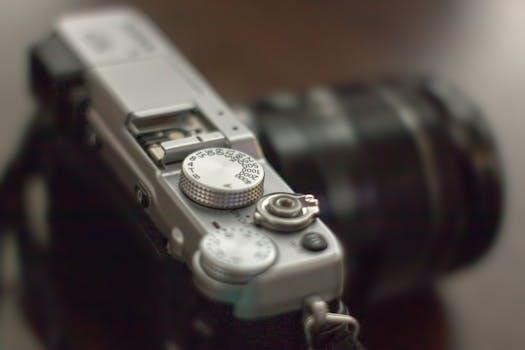
Understanding Manual Camera Mode
Manual mode in photography grants complete control over your camera’s settings. This allows the photographer to adjust aperture, shutter speed, and ISO independently. It empowers the user to capture the desired image, unlike auto mode which makes these decisions for you. This mode is essential for creative and precise photography.
What is Manual Mode?
Manual mode is a camera setting that places all exposure controls directly into the photographer’s hands. Unlike automatic or semi-automatic modes, where the camera makes decisions about aperture, shutter speed, and ISO, manual mode requires the user to set each of these parameters. This allows for complete creative control over the final image. When using manual mode, the photographer has to understand how these settings impact the look of the image. It’s not just about getting a properly exposed image, but also about creating a specific artistic effect. This mode enables photographers to make choices that align with their vision, whether that’s a shallow depth of field, motion blur, or capturing a scene in specific lighting. It’s a powerful tool for those who want to take their photography to the next level.
Why Use Manual Mode?
The primary reason to use manual mode is to gain full creative control over your photography. Automatic modes often make assumptions about what you want, but manual mode allows you to dictate every aspect of the image. This is crucial when you need a specific look, such as a shallow depth of field, a long exposure for motion blur, or precise exposure in challenging lighting conditions. Using manual mode helps you learn the intricate relationships between aperture, shutter speed, and ISO. This deeper understanding of these elements enables you to make conscious and informed decisions while taking photographs. Manual mode gives you the power to express yourself through photography. It enables you to capture exactly what you envision, allowing you to produce more impactful and creative images and transform snapshots into masterpieces.
Key Manual Settings
Three key settings are essential when using manual mode⁚ aperture, shutter speed, and ISO. These settings control the exposure of your images. Understanding each setting will give you the tools to creatively capture your vision and improve your photography.
Aperture
Aperture, often represented by f-numbers (e.g., f/2.8, f/5.6), refers to the opening in your lens that allows light to pass through to the camera sensor. A wider aperture (smaller f-number) lets more light in, creating a shallower depth of field, often used for portraits with blurry backgrounds. Conversely, a smaller aperture (larger f-number) lets less light in and increases the depth of field, suitable for landscapes where everything needs to be in focus. Adjusting the aperture also affects the amount of light entering the camera, which, along with shutter speed and ISO, determines the exposure. Understanding how aperture works is crucial for achieving creative effects and properly exposed images. It is one of the most important elements in photography, giving you control over the focus and the light.
Shutter Speed
Shutter speed is the duration for which the camera’s shutter remains open, exposing the sensor to light. It’s measured in seconds or fractions of a second (e.g., 1/1000s, 1/60s, 1s). A fast shutter speed freezes motion, ideal for capturing action shots like sports or wildlife, whereas a slow shutter speed blurs movement, often used to create artistic effects like light trails or silky-smooth water. Shutter speed directly affects the amount of light reaching the sensor, impacting the overall exposure. Faster shutter speeds require more light, and slower speeds require less. Therefore, it works in tandem with aperture and ISO to create correctly exposed images. Mastering shutter speed is essential for taking control of how motion is depicted in your photographs and achieving the desired exposure. Choosing the right shutter speed is essential for capturing the desired effect.
ISO
ISO represents the sensitivity of your camera’s sensor to light. A lower ISO value, such as 100, indicates less sensitivity, best for bright conditions, producing cleaner images with minimal noise. Conversely, a higher ISO, such as 1600 or 3200, increases sensitivity, allowing shooting in darker environments. However, higher ISO settings introduce digital noise or grain, which can degrade image quality. Therefore, it is essential to use the lowest ISO possible for optimal image clarity. The range of ISO settings varies depending on the camera model, but most modern cameras offer a range from 100 to 6400 or higher. Understanding how ISO impacts image quality and exposure is crucial for mastering manual mode. Knowing when to increase ISO to capture images in low light without introducing excessive noise is a key aspect of photography.
The Exposure Triangle
The exposure triangle consists of three interconnected elements⁚ aperture, shutter speed, and ISO. These three settings work together to determine the brightness of a photo. Mastering the relationship between them is crucial for achieving proper exposure and creative control in manual mode.
Relationship Between Aperture, Shutter Speed, and ISO
Aperture, shutter speed, and ISO are the three pillars of the exposure triangle, each influencing the final image’s brightness and aesthetic. Aperture, measured in f-stops, controls the amount of light entering the lens and affects depth of field. A wider aperture (lower f-number) allows more light and creates a shallow depth of field, blurring the background. Shutter speed determines the duration the camera’s sensor is exposed to light, impacting motion blur. Faster shutter speeds freeze action, while slower speeds create motion blur. ISO measures the sensitivity of the camera’s sensor to light; higher ISO values are used in low light but introduce noise. These three settings interact, meaning changing one often requires adjusting another to maintain a balanced exposure. For example, if you increase the ISO, you might need to decrease the aperture or shutter speed to avoid overexposure. Understanding this delicate balance allows photographers to take control and capture the exact image they envision.
Practical Application of Manual Settings
Applying manual settings involves understanding how each setting affects the final image. This includes adjusting for different lighting conditions, like using higher ISO in low light and carefully balancing aperture and shutter speed. Mastering this gives you full control over the image.
Setting the Camera to Manual Mode
To begin your journey into manual photography, the first step is to locate the mode dial on your camera. This dial usually has several options, including ‘Auto’, ‘Program’, ‘Aperture Priority’, ‘Shutter Priority’, and importantly, ‘Manual’ or ‘M’. Rotate the dial until the arrow or marker aligns with the ‘M’ symbol. Once selected, your camera is now in manual mode. This means that all exposure settings, such as aperture, shutter speed, and ISO, are controlled by you, and not by the camera’s internal automatic system. You will now have the freedom to adjust these settings as you see fit, allowing you to experiment and create images exactly the way you envision them. It’s crucial to understand that in manual mode the camera will not make any exposure adjustments for you. Therefore, you will need to learn how each setting affects your images. This initial step marks the beginning of your full control over your camera.
Adjusting Settings for Different Lighting Conditions
Mastering manual mode requires understanding how to adjust camera settings according to varying lighting conditions. In bright daylight, start with a low ISO, such as 100, and a smaller aperture (higher f-number) to prevent overexposure. A faster shutter speed will also help capture a sharp image. In lower light, for example during the evening or indoors, you will need to increase your ISO, potentially to 400 or 800, and open your aperture wider (lower f-number). If the light is still too dim, consider using a slower shutter speed, but be mindful of potential motion blur. For very low-light situations like nighttime, you might need to push your ISO to 1600, 3200, or even higher. These high ISO settings can introduce noise, so try to balance them with aperture and shutter speed. Remember, the interplay of ISO, aperture, and shutter speed is key to achieving proper exposure in all lighting environments. The ability to adjust these settings will enable you to capture well-exposed photographs under any conditions.
Step-by-step process of manual shooting
To begin shooting in manual mode, first, set your camera dial to ‘M’. Next, consider the lighting conditions and choose your base ISO. In bright light, use a low ISO like 100. Then, decide on the aperture you want based on your desired depth of field. A wide aperture (low f-number) will blur the background, while a narrow aperture (high f-number) keeps more of the scene in focus. Next, adjust your shutter speed to get the correct exposure. You can use the camera’s built-in light meter as a guide. If the meter reads underexposed, slow down the shutter speed and if it reads overexposed, speed it up. Take a test shot and review it. Fine-tune your settings as needed, adjusting aperture, shutter speed, or ISO until you achieve your desired exposure and depth of field. Repeat this process, adjusting your settings when the lighting changes. This step-by-step process allows for complete creative control, which makes it incredibly helpful for photographers.
Common ISO settings and their usage
ISO determines your camera sensor’s sensitivity to light. Lower ISO settings, such as 100 or 200, are ideal for bright conditions and produce the highest image quality with minimal noise. ISO 400 is suitable for indoor settings or overcast days. As light decreases, you may need to increase the ISO. ISO 800 or 1600 is often used in dimly lit interiors or at dusk. In very low light, such as at night, higher ISOs like 3200 or 6400 might be necessary. However, higher ISOs can introduce noise, which appears as grain or speckling in the image. In product photography, it’s best to stay within ISO 100 to ISO 400; In street photography, many photographers use ISO 3200 to 6400 as the upper limit. Always try to use the lowest ISO possible for the best image quality. Understanding how to adjust ISO is vital for getting well-exposed images in different lighting situations.
